AppCode
In this detailed article, I’ll show you how to remove unused CSS to help reduce your website or application size and help improve the user experience by having a smaller CSS code base.
Table of Contents
Without a doubt, CSS files are notorious for gaining redundant and unused CSS styles. It often happens when unused or redundant blocks of code from previous stylings become obsolete. Also, it could be because you have an extensive CSS framework such as Bootstrap and cherry-pick styles and features from the CSS library.
Yes, it’s possible to have redundant CSS codes in a project. Unfortunately, unused CSS code over time becomes junk; hence, they slow down page load time, thus, dropping the quality of the user experience.
Note: Before we proceed, I want you to know that removing unused CSS from your project is complex. And, if you’ve browsed this article, it’s because you’re hoping to be shown the ideal tool that will point you to an easy way to delete CSS from your project. We will review a few tools to get this job done!
Why Remove Unused CSS
There’s a motive behind removing unused CSS styles. The primary reason behind wanting to remove unused CSS from your project is size. It could be because you’ve used a heavy CSS framework, custom files, or a large project main CSS file. As an author, you’ve only used a handful of the styles, patterns, and functionality provided in the framework and other files on each page of the site.
Unfortunately, these CSS frameworks don’t often provide easy ways to access the exact functionality, pattern, or style you wish to use.
For instance, if you load 120KB worth of CSS into your project. You might have a suspicion that you aren’t using some or most of the portion of the CSS code. That’s a valid reason to feel concerned. If you had a 120KB image that you could compress to about 50KB, you would do that. Compressing an image is almost like CSS because the perks of shortening and reducing the size of CSS codes are more critical. The criticalness is because CSS typically loads in the head of the HTML page and can also be render-blocking, while the image (JPG or PNG) may not be.
Five Ways to Remove Unused CSS
Let me put it out there; I’m pretty skeptical about automated tooling, but there can be massive benefits. Anyhow, I can be objective with my analysis here, but this isn’t about my take; it’s going to be about the tools. So, let’s move on to some of the tools which can help you remove unused CSS.
Google’s Chrome Coverage Tool
Google Chrome has a coverage tool that will highlight all the CSS and JavaScript in use. For instance, take a look at this page. It’s google.com, showing the unused bytes on the page. The first three CSS files, for example, have about 29% unused code and the rest of the CSS is being used elsewhere.
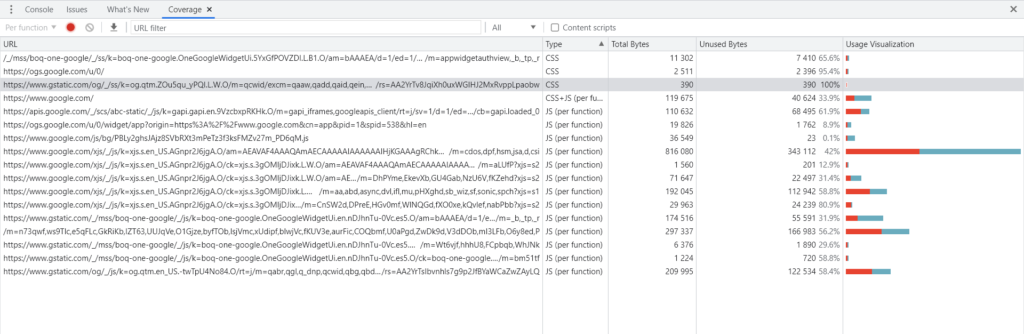
Heads up: unless you have a Single Page App, the coverage tab is not useful in getting multi-page looked up.
Unfortunately, I find studying code coverage ineffective, and it paints a complex picture of the unused code on a web page or the entire website. Interestingly, this might be why you want to delete “the unused” CSS codes in the first place.
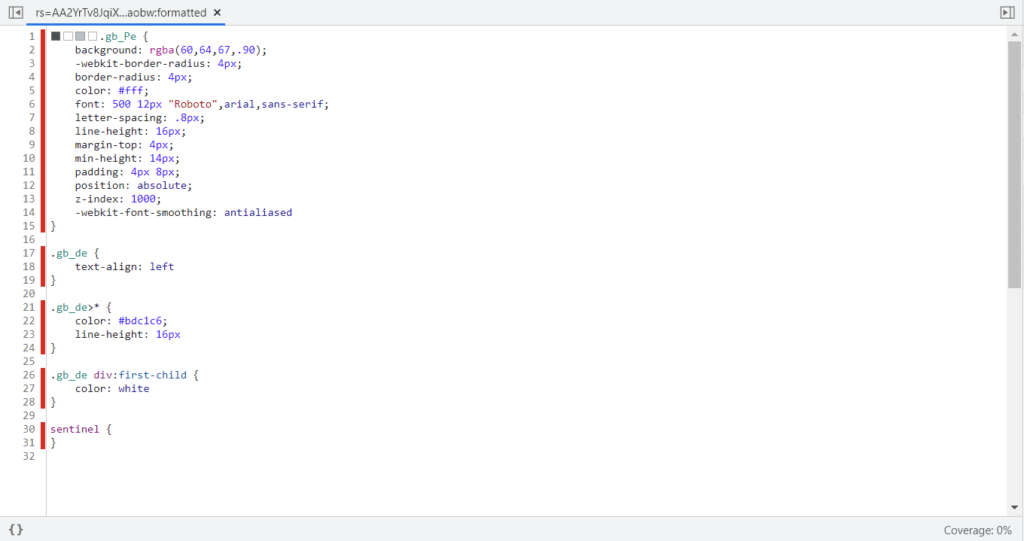
The image above highlights the major problem you are bound to have when using the coverage tool. You look at the new lines, and you are tempted to think you have to delete the CSS. You do that, and voila, you’ve caused a big styling problem throughout the page or website. So, how do you know if a CSS selector is truly unused? You:
- Matching every single web page that’s linked with the stylesheet
- Checking for styles while you’re executing the JavaScript
- Check every possible combination of the different states of the site.
- Check different screen sizes against the media queries you’ve written.
You’ve got to check every page thoroughly, not just the homepage or the top-level web pages. If you don’t dig through the states and the edge-case scenarios, you might be deleting the dropdown styling for the nav or a pop-up modal that pops up on the dashboards of disabled accounts. Most definitely something you may not notice.
PurifyCSS
PurifyCSS takes URLs and provides a chunk of CSS that can be copy-pasted. It effectively grabs all the HTML files selected for process comparison against any specified CSS file. PurifyCSS searches through the entire HTML files; it removes all the redundant CSS styles present in the project and writes the purified CSS in a different file, then relinks the .html files to the purified CSS file.
The authors responsible for this tool take content such as HTML, JS, PHP, and CSS, to name a few, and returns only the “used” CSS. It doesn’t modify the original CSS file. And if your website or application uses a CSS framework, it picks many selectors and highlights how often the files are used.
I understand that it gives users the chance to paste in other URLs (which is quite impressive), but there can be hundreds of pages of URLs in a web application. Many of these files may be pretty similar, though they are potential pages with active selectors.
A basic purifyCSS command:
npm i purify-css -DPurify is simple to set up, first we’ll create a new file. Let’s name our file used.js and add the following code:
// used.js
const purify = require("purify-css")
const htmlFiles = ['*.html'];
const cssFiles = ['*.css'];
const opts = {
    output: 'purified.css'
};
purify(htmlFiles, cssFiles, opts, function (res) {
    log(res);
});
Remember, we’ve extracted the purify function from purify-css. We have to set the CSS and HTML files that we wish to rid of unused styles to CSS files and HTML files, respectively.
const htmlFiles = ['*.html'];
const cssFiles = ['*.css'];
These variables hold the files in an array. In this context, we used the glob pattern to specify the purify-CSS to collate the .html and .css files present in our project and get rid of them.
Next, we’ll call the purify function that passes the HTML files, the CSS files, and a callback function that the tool will call via the purification process when it is completed.
purify(htmlFiles, cssFiles, opts, function (res) {
    log(res);
});
Finally, we’ll run the purify.js to clean out the unused CSS:
node purify.jsThe build process
PurifyCSS is typically used as a build process rather than the usual online interface. The docs have instructions for Webpack, Gulp, and Grunt. For instance, globbing different files to vet and process them. The content blob could represent a list of a single template, JavaScript, and partial file that creates your site.
var content = ['**/src/js/*.js', '**/src/html/*.html'];
var css = ['**/src/css/*.css'];

var options = {
  // Will write purified CSS to this file.
  output: './dist/purified.css'
};

purify(content, css, options);
PurgeCSS
PurgeCss is also an effective tool that cleans out unused CSS styles. The exciting thing is that it can be incorporated into your web or application workflow environment, and it can be used, also, as a CLI tool.
Starting with:
npm i purgecss -gNext, run the command written in the table below by supplying the –css and –content arguments:
purgecss --CSS index.css --content index.htmlBut what does the above command imply? It collects the index.css and index.html files and removes all redundant CSS selectors that exist in them. The cool thing with this tool is that also the NPM registry option can be installed using:
npm i purgecss -DPurgeCSS is, without a doubt, a force to reckon with. Many authors are currently using it and are writing about it. Sarah Dayan, for instance, shares how she dropped 250kb of dead CSS weight using purgeCSS.
Finally, this tool uses a purge method referred to as purgecssResult. The method contains the results of the purged CSS.
You can run the file using:
node purgecss.jsUnusedCSS
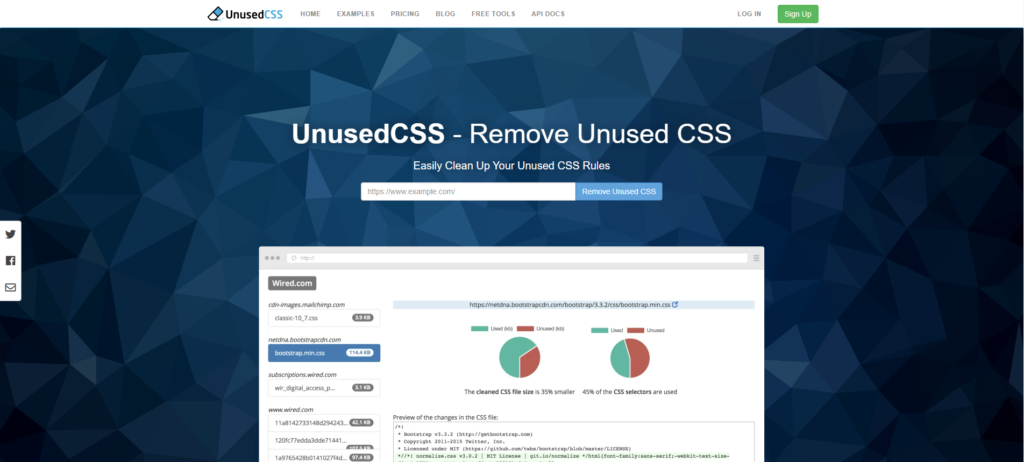
It is pretty tough to manually configure a CSS purging tool to look at every web page from every angle is quite a hassle. In addition, you will need to ensure that it is kept in sync daily as your code blocks evolve. Interestingly, UnusedCSS is an online service tries to deal with this trouble by crawling the website based on the URL you input in the search box.
UnusedCSS also lets users download the purged file and offers customization such as checking selectors you want and unselecting the ones you don’t. But that’s not all – it also prefixes and removes all duplicate selectors present in the file.
UnCSS
UnCSS is a Node module that removes unused CSS. It is similar to purifyCSS and has a JS API that can be called with options to remove unused CSS styles. According to the tools’ author, UnCSS removes redundant CSS from your entire stylesheets. UnCSS also works across many files and supports CSS that is JavaScript-injected. To install this tool as a global module from the terminal, all you’ve got to do is type out:
npm i uncss -g
Users can explore the tool from anywhere in their system. Meanwhile, a basic command line you can use to activate UnCSS is.
uncss src/app/app.component.html >> usedcss.cssAll the CSS in “src/app/app.component.html” will be displayed in the “usedcss.css.” directory.
Conclusion
Don’t forget to check out your web project for redundant CSS code. First, you’ll need to figure out if you have unneeded CSS styles. Then, use the tools highlighted above to purge them, and remember, removing this extra CSS can make each page load faster.
Recommended Articles
- Implementing Modern Fluid Typography Using CSS Clamp
- The Awesome CSS Clip-path Property
- The Awesome CSS mask-image Property
- The CSS justify-self Property
- The Awesome CSS Transform Property and Scale Function
- Explaining the Scale Property in CSS