AppCode
Contribute and help us stay up-to-date. Edit this page on GitHub.
The article demonstrates how to handle and validate a few types of form inputs with jQuery before sending the data to a server.
Forms are a common feature of webpages.[1] They commonly provide services such as authenticating users via login and registration, collecting feedback, checking out for purchasing products, searching, profiles, adding descriptions, setting usernames, and any other implementations you can imagine.[2]
In the sections below we’ll cover a step-by-step breakdown installing jQuery, performing operations to collect data from the form input fields as variables, validating data is the correct type using by using a regular expression (regEx), and returning an error message if a field input is an invalid type whenever the form is submitted. The form used is an account registration example that will include the name, email, and password fields.
- Installing jQuery
- Form markup
- Form styles
- jQuery form handling
- Form validation
- Sending form data
- See also
- References
First, in order to use jQuery we need to add it to a webpage. There are multiple ways to include jQuery.[3] We will being adding the jQuery library with a file hosted on a Content Delivery Network (CDN) in the <head> element of the website markup.
Note: If you already have the jQuery library hosted on a server, skip this step and include the library via a script tag pointed at the https location of the file.
A script element can be used to add a JavaScript file from a remote source such as a CDN to your webpage.[4] This file is hosted on cdn.js. Add this element before the closing </head> tag.
<script src="https://cdnjs.cloudflare.com/ajax/libs/jquery/3.6.4/jquery.min.js"></script>
To specify a different version of jQuery you can change the version in the URL.[5]
https://cdnjs.cloudflare.com/ajax/libs/jquery/{version number}/jquery.min.js
                                              ^
                                              | - Library version
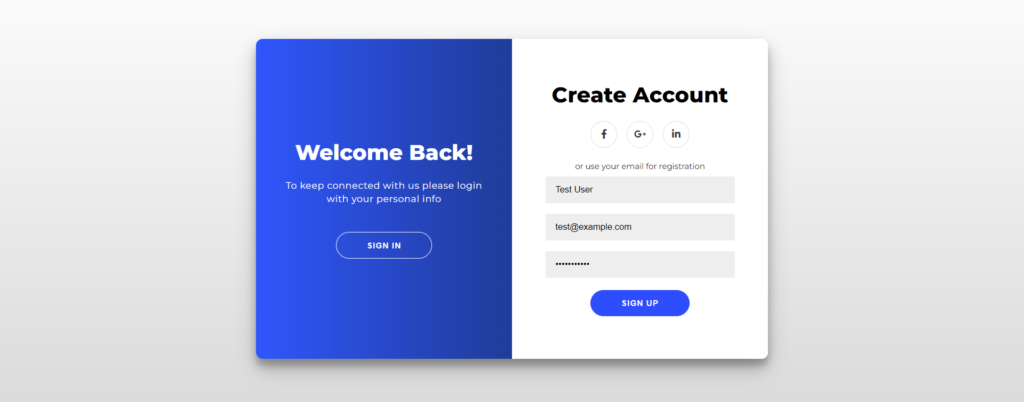
A form requires HTML when using markup.[6] The HTML below is the markup of our form which tells the browser which input fields, labels, buttons, and attributes should be included.[7]
<div id="container">
  <div class="form-container">
    <form id="signup_form" method="post" action="#">
      <h1>Create Account</h1>
      <span>with your name, email, and password.</span>
      <input id="name" type="text" placeholder="Name" />
      <input id="email" type="email" placeholder="Email" />
      <input id="password" type="password" placeholder="Password" />
      <button>Sign Up</button>
    </form>
  </div>
  <div class="overlay-container">
    <div class="overlay">
      <div class="overlay-panel">
        <h1>Welcome Back!</h1>
        <p>To manage your content login with your credentials.</p>
        <button id="signIn">Sign In</button>
      </div>
    </div>
  </div>
</div>
Below is what the account creation form looks like without CSS styles.
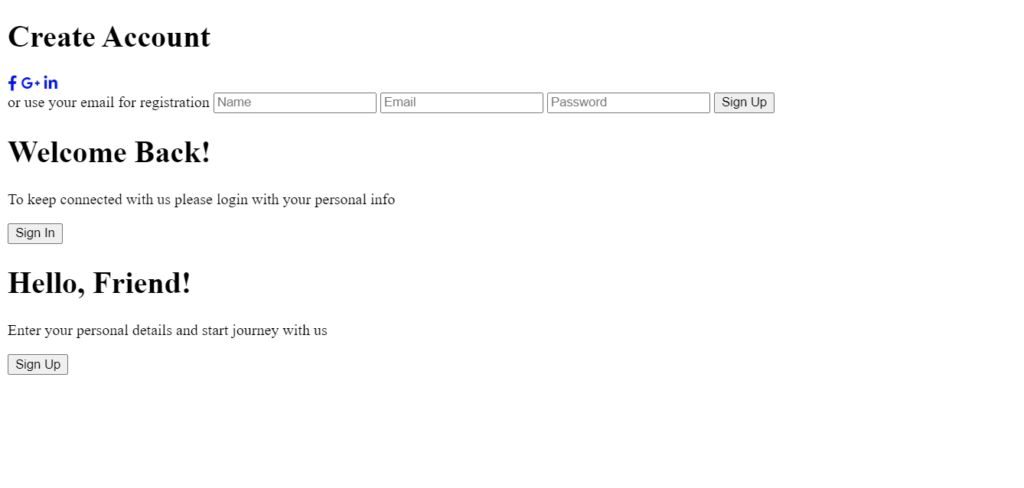
Note: Remember, the CSS is not fixed; you can customize the styles.
* {
  box-sizing: border-box;
}

body {
  background: #f6f5f7;
  display: flex;
  justify-content: center;
  align-items: center;
  flex-direction: column;
  font-family: sans-serif;
  height: 100vh;
  margin: 0;
  background: linear-gradient(white, #d7d7d7);
}

h1 {
  margin: 0;
}

p {
  font-size: 14px;
  font-weight: 100;
  line-height: 20px;
  letter-spacing: 0.5px;
  margin: 20px 0 30px;
}

span {
  font-size: 12px;
}

button {
  border-radius: 20px;
  border: 1px solid #2b47ff;
  background-color: #2b49ff;
  color: #ffffff;
  font-size: 12px;
  font-weight: bold;
  padding: 12px 45px;
  letter-spacing: 1px;
  text-transform: uppercase;
  transition: transform 80ms ease-in;
  margin-top: 10px;
}

button:active {
  transform: scale(0.95);
}

button:focus {
  outline: none;
}

#signIn {
  background-color: transparent;
  border-color: #ffffff;
}

form {
  background-color: #ffffff;
  display: flex;
  justify-content: center;
  flex-direction: column;
  padding: 0 50px;
  height: 100%;
}

input {
  background-color: #eee;
  border: none;
  padding: 12px 15px;
  margin: 8px 0;
  width: 100%;
}

#container {
  border-radius: 10px;
  box-shadow: 0 14px 28px rgba(0, 0, 0, 0.25), 0 10px 10px rgba(0, 0, 0, 0.22);
  width: 750px;
  max-width: 100%;
  min-height: 480px;
  display: flex;
  overflow: hidden;
}

.form-container {
  width: 100%;
  height: 100%;
  order: 2;
}

.overlay-container {
  width: 100%;
  height: 100%;
  overflow: hidden;
}

.overlay {
  background: #ff416c;
  background: -webkit-linear-gradient(to right, #ff4b2b, #ff416c);
  background: linear-gradient(to right, #2b53ff, #0d2234);
  background-repeat: no-repeat;
  background-size: cover;
  background-position: 0 0;
  color: #ffffff;
  height: 100%;
  width: 200%;
}

.overlay-panel {
  display: flex;
  justify-content: center;
  flex-direction: column;
  height: 100%;
  width: 50%;
  padding: 0 40px;
}

.error {
  height: 20px;
  color: red;
  line-height: 20px;
  text-align: left;
  display: block;
  width: 100%;
}
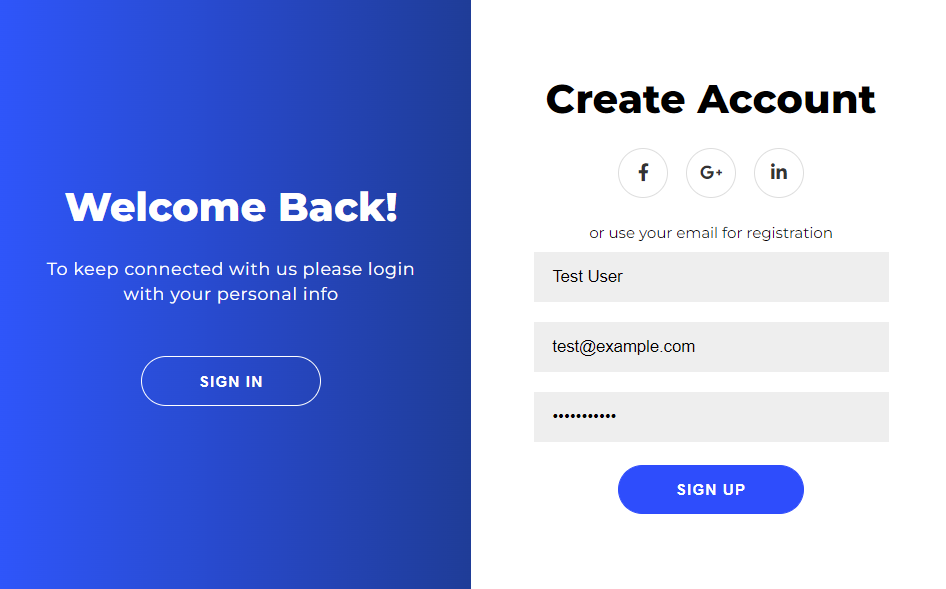
After adding the CSS styles to your signup form, it should look similar but not identical to the image below as we removed some of the styles and HTML markup to simplify the demonstration.
After adding the styles and properties to the form, we need to add the jQuery functionality to start validating user input.
The below code will add field validation and error handling to the form.
$(document).ready(function () {

  $("#signup_form").submit(function (e) {
    e.preventDefault();

    var name = $("#name").val();
    var email = $("#email").val();
    var password = $("#password").val();

    $(".error").remove();

    // Check the name length, return an error if field is empty.
    if (name.length < 1) {
      $("#name").after(
        '<span class="error">Name is required</span>'
      );
      return;
    }

    // Check the email length, return an error if the field is empty.
    // Also run a regex against the email to verify the value is an email.
    if (email.length < 1) {
      $("#email").after('<span class="error">Email is required</span>');
      return;
    } else {
      var regEx = /^([a-zA-Z0-9_.-+])+@(([a-zA-Z0-9-])+.)+([a-zA-Z0-9]{2,4})+$/;
      var validEmail = regEx.test(email);
      if (!validEmail) {
        $("#email").after('<span class="error">Enter a valid email</span>');
        return;
      }
    }

    // Check the length of the password value, if empty return an error.
    if (password.length < 8) {
      $("#password").after(
        '<span class="error">Password must be at least 8 characters long</span>'
      );
      return;
    }

    // If form has been filled send the data to a server.
    // In this case we create an alert message
    alert(
      "Name : " +
      name +
      "n" +
      "Email : " +
      email +
      "n" +
      "DO SOMETHING WITH THE INFORMATION"
    );
  });
});
Let’s describe each part of the code using smaller blocks to understand what is happening within our jQuery code.
The jQuery ready function executes the code to only after the DOM is ready in the browser.
$(document).ready(function() {
 	//CODE HERE
});
The form submit is triggered whenever the user clicks the submit button in the form. By using the jQuery e.preventDefault() function, the form is not sent to the server automatically, it cancels the default event by not triggering it.[8] We could then submit it by using the .submit() function after successful validation.[9] This allows us modify or validate the form data before allowing the data to send.
$('#signup_form').submit(function(e) {
   e.preventDefault();
   //Form dating handling such as modifcation or validation
});
The syntax below is the general format in jQuery to select an input value from specific input element.[10]
Syntax:
var fieldName = $('fieldCSSSelector').val();
Below, we use three variables, the name, email, and password. The value of these variables can be set from the input value of their respective fields by using the .val() function jQuery.[11]
var name = $("#name").val();
var email = $("#email").val();
var password = $("#password").val();
All of the markup, styles, and jQuery functionality is not fixed for the example we demonstrated. You can change the code to fit the needs of you or your organization. Let’s go over validating fields and using error messages.
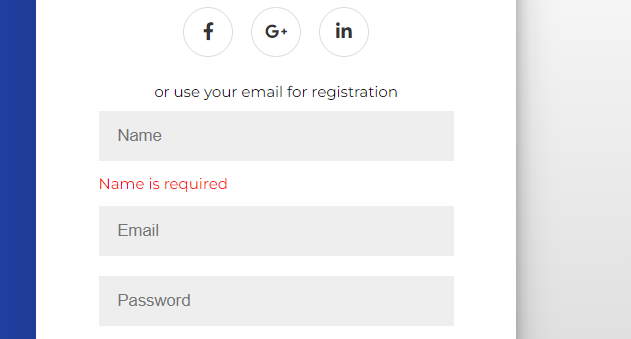
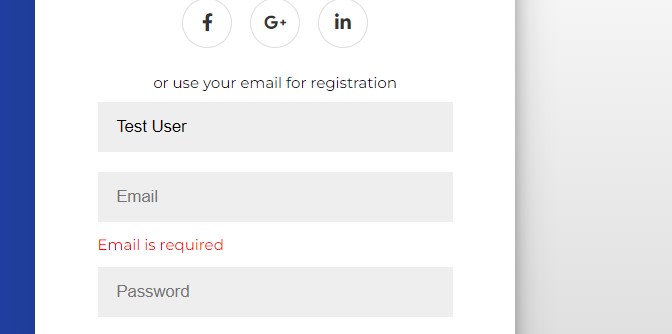
We can use the length attribute to retrieve the character length of the input.[12] The name.length combined with an if statement checks whether the user entered a name. If the user didn’t fill this field with at least 1 character it will show an error message, “Name is required”.
// Check the name length, return an error if field is empty.
if (name.length < 1) {
  $("#name").after(
    '<span class="error">Name is required</span>');
  return
The email.length if statement checks whether the user entered his email correctly. If the user didn’t fill this field it will show an error message.
// Check the email length, return an error if the field is empty.
if (email.length < 1) {
   $("#email").after('<span class="error">Email is required</span>');
   return;
}
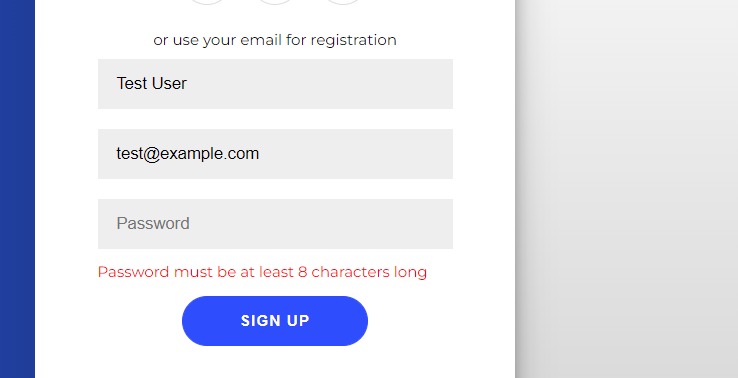
Addionally we use the length on the password variable. password.length also checks whether a user skipped the password field. The code will show an error message if the password field is less than 8 characters.
// Check the length of the password value, if empty return an error.
if (password.length < 8) {
  $("#password").after('<span class="error">Password must be at least 8 characters long</span>'
);
  return;
}
The regEx variable is regular expression to match an email address. There are several variations of the regular expression online.[13] This expression matches an email address format which allows us to check the validity of input in the email field.
var regEx = /^([a-zA-Z0-9_.-+])+@(([a-zA-Z0-9-])+.)+([a-zA-Z0-9]{2,4})+$/;
Using regEx.test() returns a Boolean value if there is a match.[14] The variable validEmail will be false if the email address is invalid.
var validEmail = regEx.test(email);
The !validEmail if statement checks the Boolean value of the variable. If the variable if false, it will show an error message.
// Also run a regex against the email to verify the value is an email.
if (!validEmail) {
   $("#email").after('<span class="error">Enter a valid email</span>');
   return;
}
We also remove all prior error messages from the form if the user has already clicked submit once. The .remove() jQuery function removes HTML elements.[15]
$(".error").remove();
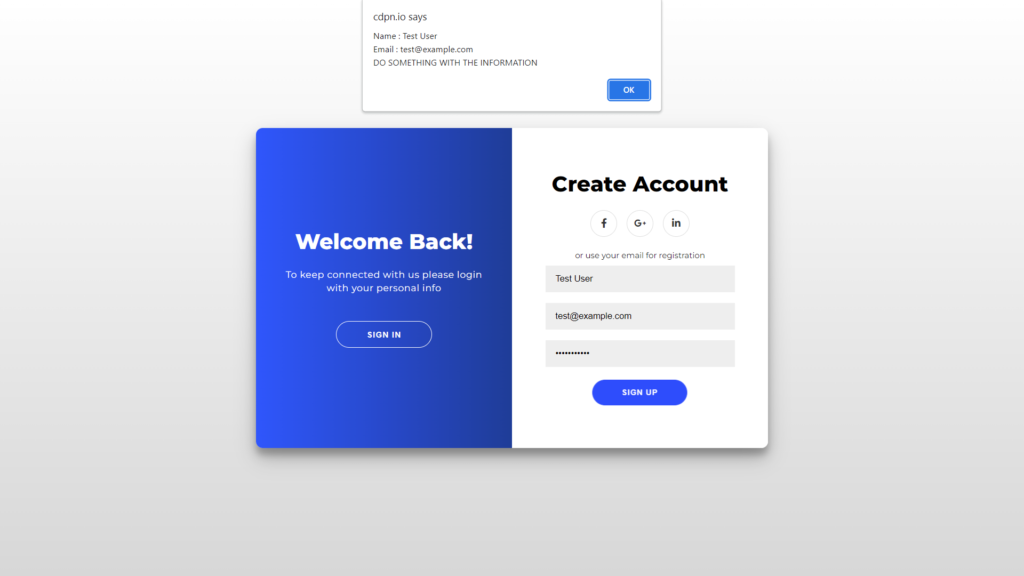
In the last section of the jQuery code, you see an alert function containing the name and the email variable. Usually, this section would prepare and send the form data, and the data is typically sent to a server that handles the new user registration.
 // If form has been filled send the data to a server.
 // In this case we create an alert message
 alert(
   "Name : " +
   name +
   "n" +
   "Email : " +
   email +
   "n" +
   "DO SOMETHING WITH THE INFORMATION"
 );
After validating form data, it is typically sent to be processed somewhere such as a server.[16] There are several ways to process user-provided data such as using Ajax,[17] an XMLHttpRequest,[18] FormData with a form element,[19].post() jQuery function,[20] and many other ways.
- ^ Wikimedia Foundation. (2023, March 23) HTML form. Wikipedia. Retrieved April 10, 2023.
- ^ Baker, K. (2022, September 14). Web forms: The ultimate guide. HubSpot Blog. Retrieved April 10, 2023.
- ^ Educative Answers Team. (2020, August 13). What are the different ways to add jQuery to our webpages? Educative. Retrieved April 10, 2023.
- ^ Staff. (2017, October 24). Including JavaScript In Your Page. Simmons University. Retrieved April 10, 2023.
- ^ community wiki. (2012, February 5). Updating jQuery version. Stack Overflow. Retrieved April 10, 2023.
- ^ Refsnes Data. (2000, June 20). HTML Forms. w3schools. Retrieved April 10, 2023.
- ^ Ohans Emmanuel. (2021, July 30). How browser rendering works – behind the scenes. LogRocket Blog. Retrieved April 10, 2023.
- ^ OpenJS Foundation. (2010, May 22). event.preventDefault(). jQuery. Retrieved April 10, 2023.
- ^ OpenJS Foundation. (2010, May 22). .submit(). jQuery. Retrieved April 10, 2023.
- ^ Staff. (2015, August 28). JQuery selectors. TutorialsTeacher. Retrieved April 10, 2023.
- ^ Staff. (2015, August 15). JQuery .val(). JavaTpoint. Retrieved April 10, 2023.
- ^ Staff. (2021, May 15). Jquery Length Property. Tutorials Point. Retrieved April 10, 2023.
- ^ Millner, R. (2008, August 18). Four regular expressions to check email addresses. Wired. Retrieved April 10, 2023.
- ^ Staff. (2011, October 13). JavaScript test() method : Regexp Object. w3resource. Retrieved April 10, 2023.
- ^ GeeksforGeeks. (2019, February 13). JQuery: Remove(). GeeksforGeeks. Retrieved April 10, 2023.
- ^ Michaelscharnagl. (2021, November 29). Use forms to get data from users. web.dev. Retrieved April 10, 2023.
- ^ EDUCBA. (2022, July 26). JQuery ajax formdata: How does ajax formdata work in jQuery. EDUCBA. Retrieved April 10, 2023.
- ^ Wikimedia Foundation. (2005, May 7). XMLHttpRequest. Wikipedia. Retrieved April 10, 2023.
- ^ Ilya Kantor. (2021, June 22). Formdata. The Modern JavaScript Tutorial. javascript.info. Retrieved April 10, 2023.
- ^ freeCodeCamp.org. (2021, April 28). JQuery Ajax Post method. freeCodeCamp. Retrieved April 10, 2023.